



Innerspark.us – Natural window light provides a soft, organic, and unpredictable quality ideal for emotive portraits and still life, whereas studio lighting offers total control, consistency, and technical precision for professional commercial work.
Choosing between natural window light and studio lighting is rarely about which is objectively better, but rather about matching the light source to your creative intent. Natural light relies on the sun’s position, weather conditions, and the time of day, creating a unique signature in every shot. Studio lighting, by contrast, turns your environment into a laboratory where you dictate the intensity, direction, and color temperature of every photon hitting your subject.
The Characteristics of Window Light
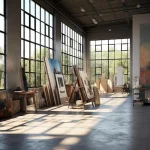
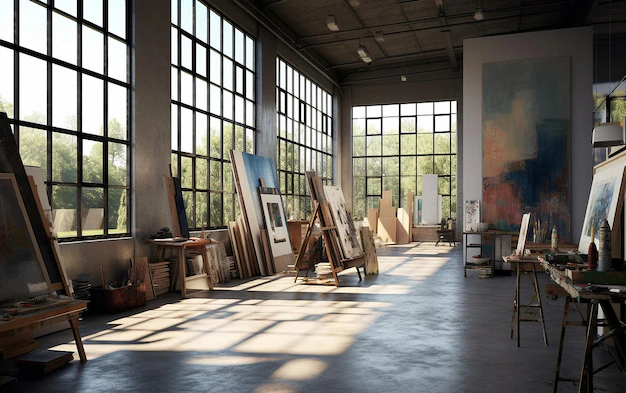
Window light is essentially a massive softbox provided by nature. Because the window pane acts as a diffuser, the light tends to wrap around the subject, creating soft shadows and natural transitions. This makes it a favorite for lifestyle photography, intimate portraiture, and artistic compositions that require a sense of authenticity.
However, the primary challenge with window light is its lack of permanence. If a cloud passes over the sun, your exposure settings must change instantly. Furthermore, you are limited by the physical location of the window. You cannot move the sun, so you must move your subject or your camera to achieve the desired lighting ratio.
The Utility of Studio Lighting
Studio lighting systems, including strobes, continuous LED lights, and modifiers, are designed to eliminate guesswork. When you are shooting a product catalog or a high-end fashion editorial, you cannot afford to wait for the perfect afternoon glow. Studio lights allow you to replicate the same lighting setup for hours or even days, ensuring consistency across a large body of work.
Beyond consistency, studio lighting grants you the power of light shaping. With grids, snoots, and honeycomb reflectors, you can isolate light to a specific area of the subject. You can also mix light sources—such as combining a warm tungsten light with a cool daylight-balanced strobe—to create complex, stylized color palettes that would be impossible to achieve with sunlight alone.
Comparison of Light Sources
| Feature | Natural Window Light | Studio Lighting |
|---|---|---|
| Consistency | Low (Fluctuates constantly) | High (Fully predictable) |
| Cost | Free | Requires investment |
| Control | Limited to positioning | Full control over intensity/shape |
| Portability | Stationary | Highly portable |
| Learning Curve | Moderate (Observation-based) | Steep (Technical knowledge) |
How to Master Window Light for Artistic Impact
To use window light effectively, you must learn to sculpt the light using the environment. Follow these steps to maximize your results:
- Assess the direction of the light: Determine if the window is north-facing (cool, consistent light) or south-facing (warm, intense light).
- Control the intensity: Use sheer curtains or white diffusion fabric to soften the light if it is too harsh, or use black foam boards to add negative fill and deepen shadows on the side of the subject away from the window.
- Manipulate the subject’s angle: Move your subject closer to the window for high-contrast, dramatic shadows, or further away for softer, more even illumination.
- Use reflectors: Place a white reflector on the shadow side of your subject to bounce light back into the dark areas, reducing the contrast ratio to a more flattering level.
Common Mistakes and How to Avoid Them
A common error when using window light is ignoring the color temperature of the room. If you have interior lights turned on while shooting near a window, you will end up with mixed lighting, which results in muddy skin tones and difficult color grading. Always turn off ambient room lighting when relying on daylight.
In a studio setting, the most common mistake is over-lighting. Beginners often try to illuminate every corner of the room, which results in a flat, clinical image. Remember that photography is the art of light and shadow. If you fill in every shadow with artificial light, you lose the depth and dimensionality that makes an image feel three-dimensional.
Strategic Integration
The most advanced artists often blend both techniques. You might use a large window as your primary “key” light to provide a soft, organic base, while using a small studio strobe with a grid to add a subtle “rim light” or “hair light” to separate the subject from the background. This hybrid approach captures the soul of natural light while maintaining the technical polish of studio production.
When deciding between the two, ask yourself: Does the subject need to feel spontaneous and raw, or polished and controlled? If the answer is raw, stay by the window. If you need to produce a series of images that look identical regardless of the weather outside, it is time to invest in a studio lighting kit.
FAQ
Q: Can I use studio lights to mimic natural window light?
A: Yes, by using a large softbox or an octabox placed close to the subject, you can simulate the soft, directional quality of a window. Adding a diffusion layer further helps replicate the look of sunlight passing through a sheer curtain.
Q: What time of day is best for window light photography?
A: The “Golden Hour”—shortly after sunrise or before sunset—provides a beautiful, warm, and soft light. However, north-facing windows provide excellent, neutral light throughout the entire day, making them a favorite for portrait artists.
Q: Do I need expensive studio lights to start?
A: No, you can start with a single continuous LED light and a basic modifier. Mastering one light source is more important than owning a vast array of expensive equipment; once you understand light direction and fall-off, you can create professional results with minimal gear.
Ultimately, your choice should serve the narrative of your art. Natural light offers an emotional connection to the environment, while studio light offers the freedom to build a vision from scratch. Practice both to build a versatile toolkit that allows you to capture any subject under any condition.
Read also: How to Ship Archival Fine Art Prints Without Bending or Creasing
📷 Photo by freepik.com