




Innerspark.us – A ring light provides a convenient, shadow-reducing front-facing glow ideal for simple talking-head vlogs, whereas a two-point studio lighting kit offers superior depth, professional dimension, and artistic control by sculpting the subject’s features with light and shadow.
Choosing the right lighting setup is a pivotal decision for any artist looking to showcase their process or portfolio on camera. While the convenience of a ring light is undeniable, the artistic requirements of a studio space often demand more nuanced illumination. Understanding the technical differences between these two setups will help you decide which tool best serves your specific content goals.
The Ring Light: Convenience and Clarity
The ring light was originally designed for macro photography and beauty influencers, but it has become a staple for casual vlogging. Its primary advantage is its circular shape, which surrounds the camera lens to provide even, flat light. This design effectively eliminates shadows on the face, making it a “forgiving” light source that hides skin imperfections and creates a signature “halo” reflection in the eyes.
For an artist, a ring light is excellent for quick setup videos or social media updates where you need to look bright and approachable. However, its flat lighting can be a drawback when you want to show the texture of your canvas or the depth of your sculpture. Because it provides light from only one direction—directly at the subject—it tends to wash out depth, making a three-dimensional art piece look flat and uninteresting on camera.
The Two-Point Studio Lighting Kit: Sculpting Your Scene
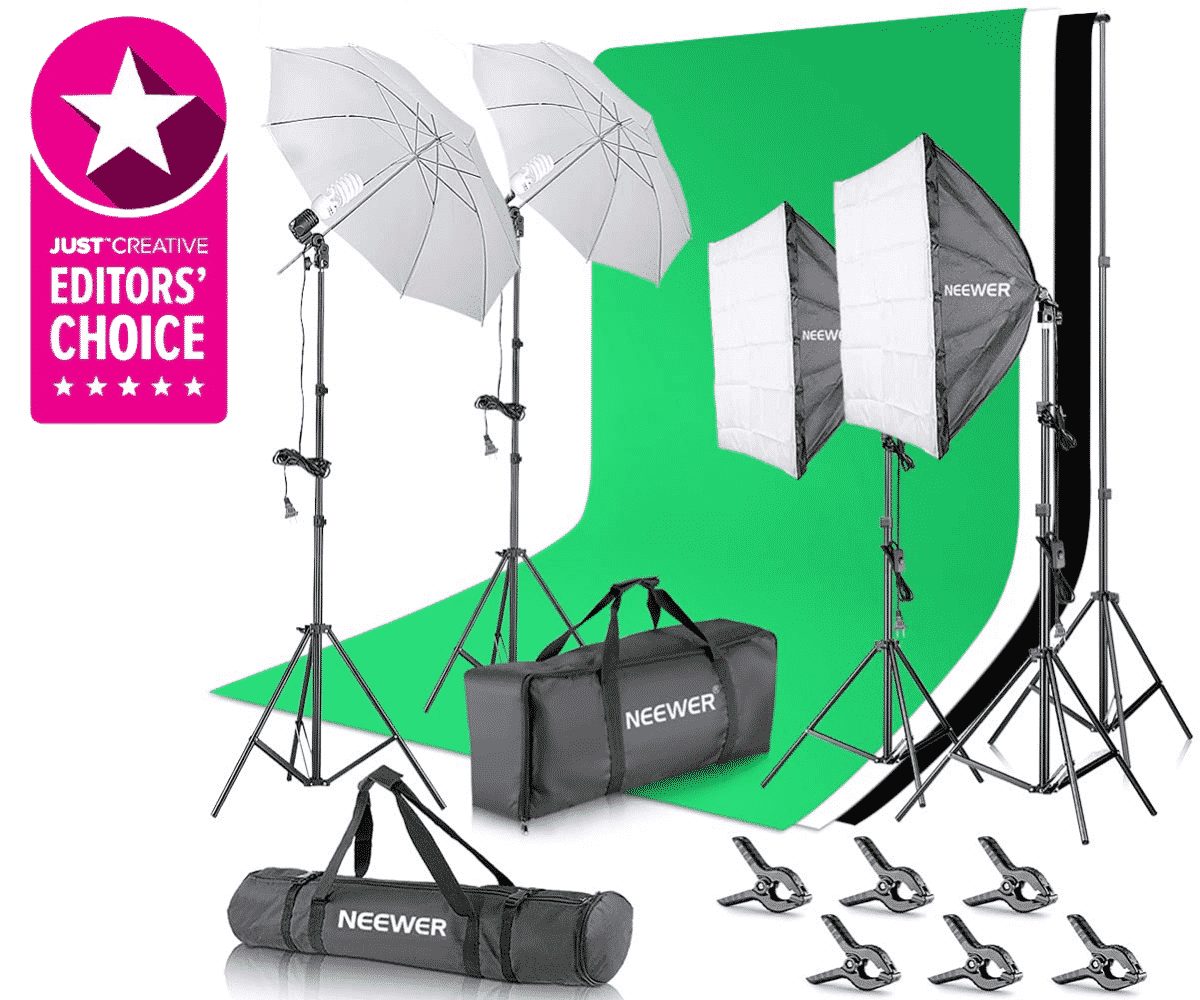
A two-point lighting kit, typically consisting of two softboxes or LED panels, offers a more professional approach. By placing lights at 45-degree angles from your subject, you create “key” and “fill” lighting. This setup mimics natural light coming through a window, which naturally creates soft shadows that define the contours of your face and the physical depth of your artwork.
This method is far superior for artist vlogs that involve live painting, drawing, or crafting. Because you have two light sources, you can position one to highlight your work surface and the other to illuminate your face, ensuring both the artist and the art remain perfectly visible without one overpowering the other. It allows for the “sculpting” of light, which adds a cinematic quality to your videos that a single ring light simply cannot replicate.
Comparison of Lighting Capabilities
| Feature | Ring Light | Two-Point Lighting Kit |
|---|---|---|
| Shadow Control | Very low (shadowless) | High (dynamic modeling) |
| Setup Time | Fast (1-2 minutes) | Moderate (5-10 minutes) |
| Depth Perception | Flat | Three-dimensional |
| Best Use Case | Quick updates/Selfies | Long-form tutorials/Process |
| Space Requirement | Minimal | Requires tripod clearance |
How to Set Up Your Two-Point Studio Lighting
Transitioning from a basic ring light to a two-point setup can significantly elevate your production value. Follow these steps to achieve a professional look:
- Place your primary light (the key light) at a 45-degree angle to the side of your camera, slightly above eye level, pointing down toward your workspace.
- Position your secondary light (the fill light) on the opposite side of the camera at a similar distance, but set it to a lower brightness intensity.
- Adjust the brightness of the fill light until it softens the shadows created by the key light without removing them entirely.
- Check your viewfinder to ensure there is no distracting glare on your canvas or paper, adjusting the angle of the lights slightly if reflections occur.
- Diffuse your lights using softboxes or white fabric sheets to ensure the light falling on your skin and art is soft and flattering rather than harsh and clinical.
Common Mistakes to Avoid
One of the most frequent errors artists make is placing their light sources too close to the camera lens. This causes “flat lighting,” which removes the natural texture of your art. If you are painting, you want the light to graze the surface to show brushstrokes and impasto techniques. Positioning your lights slightly to the side creates the necessary contrast to reveal these details.
Another mistake is mixing color temperatures. If your studio has warm overhead lights while your studio kit emits cool daylight-balanced light, your camera will struggle to balance the color, often resulting in muddy skin tones or inaccurate paint colors. Always try to match your lighting color temperature (usually 5600K for daylight) across all sources.
The Impact on Your Audience
Lighting is not just about visibility; it is about mood and professionalism. When your audience clicks on your video, the lighting quality is the first thing they perceive, often subconsciously signaling whether you are an amateur or a professional. While a ring light is perfectly acceptable for casual, behind-the-scenes stories, a two-point kit shows that you take your craft seriously. It allows you to create a “studio look” that feels immersive, inviting your viewers into your creative world rather than just showing them a flat image of it.
FAQ: Lighting for Artists
Q: Can I use a ring light and a two-point kit together?
A: Yes, you can use a ring light as a subtle “fill” or “catch light” to brighten your eyes while using a two-point kit as your primary light source for depth.
Q: Is expensive lighting necessary for high-quality art videos?
A: Not necessarily. While high-end lights offer better color accuracy (CRI), you can achieve professional results with budget-friendly LED panels as long as you understand how to diffuse the light and position it correctly.
Q: Why does my painting look shiny on camera?
A: This is caused by light reflecting directly off the surface of the paint. To fix this, move your lights further to the side or increase the distance between the lights and your canvas to soften the angle of incidence.
Ultimately, the choice depends on your workflow. If you prioritize speed and simplicity for social media, the ring light is a reliable companion. However, if your goal is to build a long-term brand as a professional artist, investing in a two-point lighting kit provides the versatility and artistic control required to make your work truly stand out.
Read also: How to Build a Minimalist Photography Portfolio That Loads Fast
📷 Photo by justcreative.com