




Innerspark.us – Setting up continuous lighting for an art studio requires a balanced approach using a key-fill-backlight configuration to eliminate harsh shadows while maintaining accurate color rendering for your artwork. By utilizing high-CRI LED panels or COB lights with softbox modifiers, you ensure that your video and photo content captures the true texture and pigment of your creative work.
Understanding Continuous Lighting vs. Strobe
For artists, the primary advantage of continuous lighting is the “what you see is what you get” workflow. Unlike flash photography, which requires test shots to verify exposure and shadow placement, continuous lights allow you to observe exactly how light interacts with your canvas or sculpture in real-time. This is essential for video production, where consistent illumination is non-negotiable for high-quality footage.
Essential Equipment for a Pro-Grade Studio
You do not need an exorbitant budget to achieve professional results, but you do need the right tools. The foundation of your setup should be high-CRI (Color Rendering Index) lights. A CRI of 95 or higher is critical; anything lower will cause your paint colors to look muddy or shifted on camera. COB (Chip on Board) LEDs are currently the industry standard because they provide a powerful, focused beam that can be easily shaped with modifiers.
| Equipment Component | Recommended Specification | Purpose |
|---|---|---|
| Main Light (Key) | COB LED (150W+) | Provides the primary illumination for the subject. |
| Fill Light | Soft LED Panel | Softens shadows created by the key light. |
| Modifier | Large Softbox (30″+) | Diffuses light to prevent hot spots on artwork. |
| Color Accuracy | CRI 95+ / TLCI 96+ | Ensures paint colors appear true to life. |
The Three-Point Lighting Technique
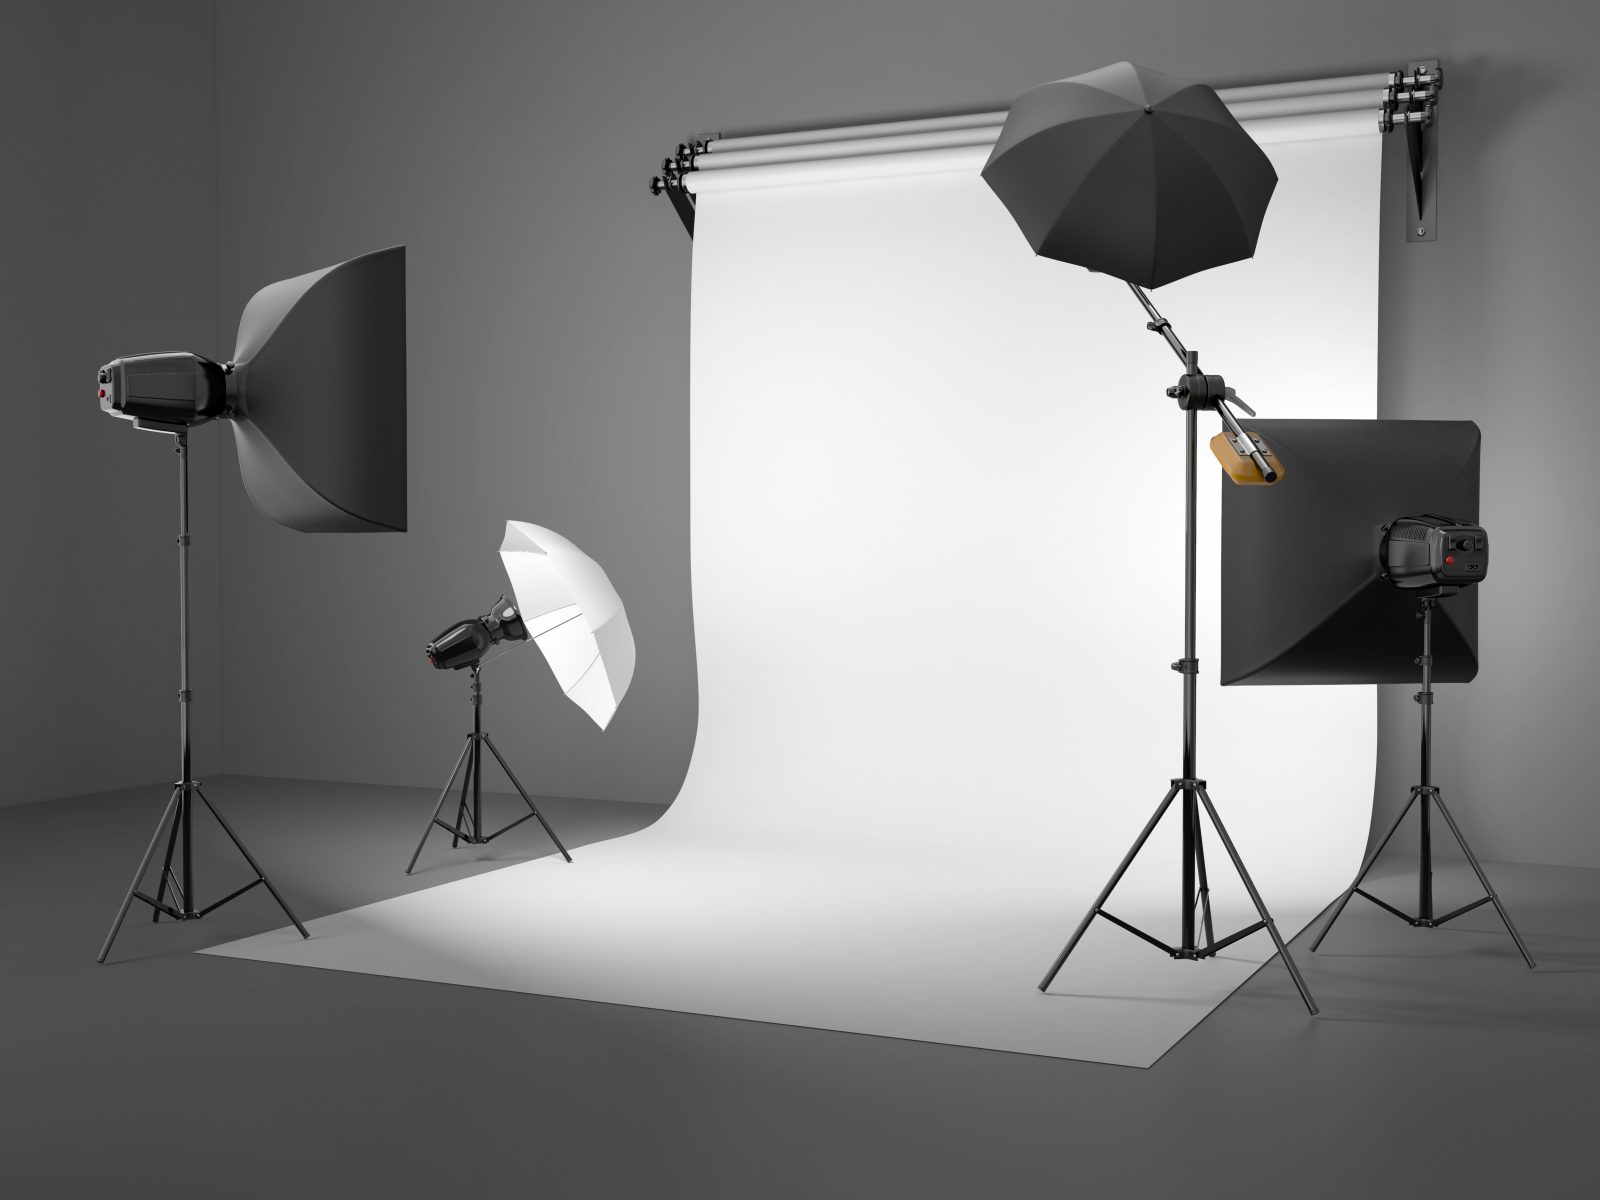
The standard three-point lighting setup is the most effective way to film or photograph art. The key light acts as the primary source, placed at a 45-degree angle to the side of the artwork or the artist. The fill light is placed on the opposite side to lift the shadows created by the key light. Finally, a backlight or rim light is positioned behind the subject to create separation from the background, adding depth and dimension to your video.
Step-by-Step Setup Guide
Follow these steps to configure your studio for optimal results:
- Position your main subject or artwork in the center of the shooting area, ensuring it is at least three feet away from the background wall to avoid unwanted shadows.
- Mount your key light on a sturdy stand and attach a large softbox to diffuse the light; place it at a 45-degree angle to the subject at roughly head height.
- Set up your fill light on the opposite side of the key light at a lower intensity—usually half the brightness of the key light—to gently fill in the shadows.
- Add a backlight behind the subject, pointing toward the back of the artist or the frame of the artwork to create a subtle glow that separates the subject from the backdrop.
- Adjust your camera white balance manually to match the Kelvin temperature of your lights (usually 5600K for daylight-balanced LEDs) to ensure color accuracy.
Common Mistakes and How to Avoid Them
One of the most frequent errors artists make is placing lights too close to the artwork. This creates “hot spots”—areas where the light is so intense that it washes out the color and texture of the paint. Always aim for a larger light source (using a large softbox) placed further back to create a softer, more even wrap of light. Another common oversight is mixing light sources. If you have daylight coming from a window and artificial LED lights in the room, your camera will struggle to balance the color temperature, leading to inconsistent skin tones or off-color canvases.
Managing Reflections on Glossy Surfaces
If you are photographing or filming oil paintings with glossy varnishes, reflections are your biggest enemy. To combat this, use a polarizing filter on your camera lens. Additionally, adjust the angle of your lights so they are not directly perpendicular to the canvas. By moving the lights further to the side, you can “skim” the light across the surface, which actually helps emphasize the texture of the brushstrokes rather than reflecting the light source back into the camera lens.
Final Adjustments for Video
When recording video, pay attention to the flicker rate of your lights. Some cheaper LED panels can cause banding in your video footage. Ensure your lights are flicker-free and match your camera’s shutter speed to your region’s power frequency (1/50th for PAL or 1/60th for NTSC). This simple calibration prevents the annoying strobe effect that can ruin otherwise perfect studio footage.
FAQ
Q: Why do my colors look different in the video than in real life?
A: This is usually due to a low CRI rating of your light bulbs or an incorrect white balance setting on your camera. Ensure your lights have a CRI of 95+ and set your camera’s white balance manually to match the Kelvin temperature of your lights.
Q: Do I need expensive lights for social media content?
A: Not necessarily, but you do need quality light. While you don’t need cinema-grade equipment, investing in a decent COB LED and a large softbox will provide significantly better results than basic ring lights or overhead room lighting.
Q: How can I minimize shadows on my background?
A: Increase the distance between your subject and the background. The further the subject is from the wall, the more the shadows will fall away from the frame, resulting in a cleaner, more professional look.
Consistency is the hallmark of a professional studio. By taking the time to set up your continuous lighting correctly using these methods, you create a controlled environment where your art takes center stage, ensuring that every video and photo you produce reflects the true quality of your work.
📷 Photo by clubwhites.co.uk